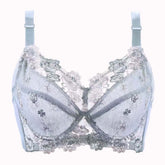
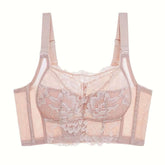
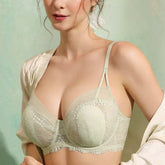
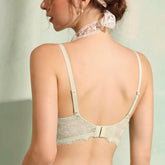
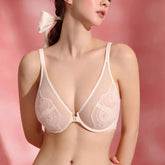
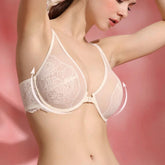
Diy Strapless Bra: My first strapless MeMade bra

Recently Orange Lingerie released a new bra pattern, the Esplanade Bra, and what makes it special is that it is finally strapless. Until now, I had not discovered any patterns for strapless bras.
I was immediately in love with the cut. A longline bra I wanted to sew anyway but had not yet found a pattern for it, and a strapless bra was also on the plan. So the cut fulfills two of my wishes. It does not get any better. I think so fast. I've never bought a bra cut.
Unlike normal bra patterns, you can save sliders, rings, and straps. Instead, plastic rods and tunnels are added (these prevent the wide band from wrinkling). Otherwise, there are no differences from the normal bra.
After my failure with the Boylston pattern (cut from Orange Lingerie), I did not expect the first attempt to be at all what.
With the Boylston pattern, I found out that the measuring method used by Orange Lingerie to determine the cup size (full bust minus upper bust) does not fit me at all, so this time I started one cup larger than the measured and then went up another cup size.
To save me all the work of tracing + cutting the wrong size this time, I only sewed the laminate cup pieces once. For the single laminate cup, I then looked to see if the cup fully covered the bust (so it didn't pinch or stick out), and there was still seam allowance. This was the case with the 32C cup. For bras without laminate, this fitting method probably does not work. It only works thanks to the laminate's own stand. So my material and time to determine the correct cup size was limited to a minimum.

Pin upper fabric to upper cup edge. Make sure that the pins are not visible on the back side
When it comes to cutting, the bra is no different from any other. Previously, when it was to be finished as one piece, I always stitched the top fabric and lining by hand. This time I tried spray time glue. It worked very well with the combination of linen tulle and (inelastic) lining/lining. With the double powernet, on the other hand, not at all.
After that, I was finally able to start sewing. I was still very cautious, so I used one fabric, a light blue linen tulle with dots, which turned out to be an online mis-purchase. There would have been no shame in that.
The instructions are very well written in large parts. The graphics are very well done. Only in the sewing of the band and the bands for the bars would be, at least for first bra sewists, more details certainly helpful. I'm all ready, admittedly, warming up to that 🙂 .
I followed Beverly Johnson's (the Fairly Bramother) motto for this sample bra: Don't do your very best work. So Dekoabsteppnähte were allowed to be a little crooked - after all, it was just to find out what needed to be changed the second time.


On the large picture you can see well how the cup shape changes by inserting the bra underwire. On the left this is in, on the right not yet. The lower pictures are from the creation process or show the temp clasp for the first fitting.
The bra is, also thanks to the missing straps, really sewn very quickly. I still had the plastic rods at home (bought for washable corsages), and through my already sewn corsets with metal rods, the plastic rods are no longer a challenge. You have to sew a tunnel anyway and insert the rods there afterward. So, if you can sew on iron-on tape, you can sew on the tunnels.
My rods are yard goods and had to be cut to the required length. It is important to note that you still round off the ends afterward with fine sandpaper. Otherwise, the rod can work through the fabric.

Due to the wide underbust band, a normal bra clasp cannot be used, and you have to resort to yard goods. At Wien2002, there were a few colors to choose from. Unfortunately no black, which I would have considered the standard color. At Sewy, there is also black, but the yard ware is also gold-plated. Had he still pending Wien2002 order and there I have me then for 4.50 € each 1m yard goods in versch. Colors ordered. I'll get the black yardage when I'm back in April at Sewy. Find that, in general, very practical.
I was thrilled from the first fitting (still with stitched) bra clasp. Except for a few minor feasible changes, it sat great right away. No comparison to the drama with the non-wearable Bolyston Bra.

Changes (in green): left lower edge - I have already sewn so with the bra. Right the cup change I make next time
I have still changed:
- Back Band Material: instead of just one layer of Powernet, I used two layers. I do the same with my other bras. This way, the bras last longer because they wear out less.
- Back Band center back: despite the additional layer of Powernet, I felt that the bra still sits a tad too loose, so I took away 0.5cm at the center back.
- Back Band Bars: two other bars at the back of the bra clasp. Without these rods, the back band had wrinkles because there was nothing to hold this wide part up (wrinkle-free). The idea came to me because this is how corsets are made.
- At the bottom hem, I took something away all around. Due to my comparatively short torso, the bra went 1-2cm past my waist (so down). I have shortened this so that it now ends all around my waist and the bra has no chance to run down.
- Frame: the instructions say to use a non-stretch or minimal stretch fabric for this piece. My used linen tulle definitely doesn't fall into that category, so I double it with non-stretch bra lining.
- Planned for next time: as with my first attempts at the DL03 bra, this one doesn't line up for me in the center front at the top. Our Sewy instructor had shown me on the DL03 cut that this problem can be fixed by adding a small 0.5cm wedge to the cup cuts at the center front. I am confident that I can make the change work.

For stapling the bra clasps I like to use washable glue. In this case, the neon colored from Prym.

This is how the good piece looks from behind

Bra clasp in yard goods
What surprised me was that this strapless bra is supposed to work without silicone-coated elastics. Strapless purchase bras I know only with silicone elastic bands. From that, I was suspicious if this would work, and I have to say, thanks to the waist length band, it doesn't need the "silicone sticky" effect at all. Had I really not expected and had mentally already reckoned with subsequently attached straps?
The bra wears fantastically great. As with my corsets, I love this feeling of being well "protected." However, you have to like it. Can well imagine that with some others, an "oppressive" feeling could arise. Due to the wide band, the bra does not cut anywhere and gives a nice overall look under fitted tops (both front and especially back).

finished bra - still with chalk mark 🙂
Pattern: Esplanade Bra (Orange Lingerie)
Material: dotted tulle and haberdashery package (Sewy), plastic rods (from own stock), yardage bra clasp (Wien2002)
Alterations: a few - see text
Conclusion: I love this cut. It looks just great and wears incredibly great. The second version is already partially cut.
I wore the bra yesterday for the first time all day and am still very excited. The strapless bra stayed dutifully in place. If you're looking for a strapless bra cut and don't mind longlines, give this cut a try.
